mNo edit summary |
mNo edit summary |
||
| (30 intermediate revisions by 5 users not shown) | |||
| Line 1: | Line 1: | ||
| + | __NOTOC__{{Contents Current| Patch = PU02| Patch Link = Performance Update Number 2}} |
||
| − | __NOTOC__ |
||
| + | Return to [[Vehicles]] |
||
| − | {{Contents Current |
||
| − | | Patch = GU09 |
||
| − | | Patch Link = Game Update Number 9 |
||
| − | }} |
||
{{Clr}} |
{{Clr}} |
||
| + | [[File:Vehicle_Prowler.gif|link=|center]] |
||
| − | == Vehicle Overview == |
||
| + | <tabview> |
||
| − | [[File:Vehicle_Prowler.gif]] |
||
| + | Prowler/Main|Main |
||
| − | <br /> |
||
| + | Prowler/Weapons|Weapons |
||
| − | {| align="right" width="330" cellpadding="0" cellspacing="1" style="text-align:left; margin-right: 5px;" |
||
| + | Prowler/Cosmetics|Cosmetics |
||
| − | | colspan="2" class="cert-header" style="text-align:center;" |[[File:Prowler_Side_View_Icon.png|center]]Prowler |
||
| + | Prowler/History|History |
||
| − | |- |
||
| + | Prowler/Media|Media |
||
| − | | class="row-odd" rowspan="3"|Primary Weapons |
||
| + | </tabview> |
||
| − | | class="row-odd" |{{Row||P2-120 HEAT}} |
||
| − | |- |
||
| − | | class="row-even" |{{Row||P2-120 AP}} |
||
| − | |- |
||
| − | | class="row-odd" |{{Row||P2-120 HE}} |
||
| − | |- |
||
| − | | class="row-even" rowspan="7" |Secondary Weapons |
||
| − | | class="row-even" |{{Row||G30 Walker}} |
||
| − | |- |
||
| − | | class="row-odd" |{{Row||G30 Vulcan}} |
||
| − | |- |
||
| − | | class="row-even" |{{Row||G40-F Ranger}} |
||
| − | |- |
||
| − | | class="row-odd" |{{Row||M12 Kobalt}} |
||
| − | |- |
||
| − | | class="row-even" |{{Row||M20 Basilisk}} |
||
| − | |- |
||
| − | | class="row-odd" |{{Row||P525 Marauder}} |
||
| − | |- |
||
| − | | class="row-even" |{{Row||E540 Halberd}} |
||
| − | |- |
||
| − | | class="row-odd" style="text-align:center" colspan="2"|{{Row||Customizations}} |
||
| − | |} |
||
| − | |||
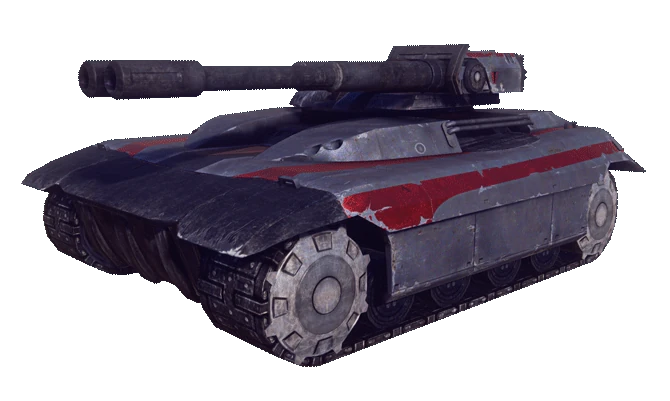
| − | The '''Prowler''' is a versatile tank used exclusively by the [[Terran Republic]]. It boasts a higher top speed and its twin barrel cannons are capable of inflicting damage quicker than the other tanks. |
||
| − | |||
| − | [[File:Prowler_Diagram.png|center]] |
||
| − | |||
| − | <div style="clear: both; height:0px; width:100%;"> </div> |
||
| − | |||
| − | ==Prowler Strategy Links== |
||
| − | *[[Tech Plant#Advanced Offensive Strategy|Tech Plant Advanced Offensive Strategy]] |
||
| − | *#Use this main battle tank to take out turrets and vehicles defending the tech plant. |
||
| − | *[[Bio Lab#Advanced Offensive Strategies|Bio Lab Advanced Offensive Strategies]] |
||
| − | *#When assaulting a Bio Lab in this vehicle, clear the way for your team to reach the outposts surrounding the main dome. |
||
| − | *[[Amp Station#Basic Base Strategies|Amp Station Basic Base Strategies]] |
||
| − | *#When attacking the Amp Station, look out for enemy MBTs and Turrets and take those out fast. |
||
| − | *[[Amp Station#Defensive Strategy|Amp Station Defensive Strategy]] |
||
| − | *#When defending the Amp Station, use your MBT to secure common Galaxy landing spots and enemy hotspots. |
||
| − | |||
| − | == Certifications == |
||
| − | {{Prowler Vehicle Certifications}} |
||
| − | == Weapons == |
||
| − | ===Primary Weapons=== |
||
| − | {{Prowler Weapon Certifications}} |
||
| − | {{Clr}} |
||
| − | {{WeaponInfobox |
||
| − | |Name = P2-120 HEAT |
||
| − | |Image = P2-120 HEAT.png |
||
| − | |Description = The P2-120 HEAT fires high-explosive anti-tank rounds that are effective against armored targets and have a moderate blast radius harmful to soft targets. |
||
| − | |Empire = TR |
||
| − | |Fire Rate = 120 |
||
| − | |MaxDamage = 1100 |
||
| − | |MinDamage = 1100 |
||
| − | |MaxInDamage = 700/1.5 |
||
| − | |MinInDamage = 1/5 |
||
| − | |Velocity = 225 |
||
| − | |Reload Speed = 2.5s/2.5s |
||
| − | |Ammunition = 2/50 |
||
| − | |Range = Very Long |
||
| − | |Fire Modes = Semi-Automatic |
||
| − | |Cert Cost = Default |
||
| − | |SC Cost = Default}} |
||
| − | {{WeaponInfobox |
||
| − | |Name = P2-120 AP |
||
| − | |Image = P2-120 AP.png |
||
| − | |Description = The P2-120 AP fires armor-piercing rounds that are exceptional against heavily armored targets but have almost no blast radius.<br><br> |
||
| − | |Empire = TR |
||
| − | |Fire Rate = 120 |
||
| − | |MaxDamage = 1200 |
||
| − | |MinDamage = 1200 |
||
| − | |MaxInDamage = 500/0.5 |
||
| − | |MinInDamage = 1/1 |
||
| − | |Velocity = 250 |
||
| − | |Reload Speed = 2.5s/2.5s |
||
| − | |Ammunition = 2/50 |
||
| − | |Range = Very Long |
||
| − | |Fire Modes = Semi-Automatic |
||
| − | |Cert Cost = 750 |
||
| − | |SC Cost = 700}} |
||
| − | {{WeaponInfobox |
||
| − | |Name = P2-120 HE |
||
| − | |Image = P2-120 HE.png |
||
| − | |Description = The P2-120 HE fires high explosive rounds that have a greater and more lethal blast radius but does less armor damage.<br><br> |
||
| − | |Empire = TR |
||
| − | |Fire Rate = 120 |
||
| − | |MaxDamage = 650 |
||
| − | |MinDamage = 650 |
||
| − | |MaxInDamage = 700/2 |
||
| − | |MinInDamage = 1/8 |
||
| − | |Velocity = 250 |
||
| − | |Reload Speed = 3.5s/3.5s |
||
| − | |Ammunition = 2/50 |
||
| − | |Range = Very Long |
||
| − | |Fire Modes = Semi-Automatic |
||
| − | |Cert Cost = 1000 |
||
| − | |SC Cost = 700}} |
||
| − | {{Clr}} |
||
| − | |||
| − | ===Secondary Weapons=== |
||
| − | {{Prowler Secondary Weapon Certifications}} |
||
| − | {{Clr}} |
||
| − | {{WeaponInfobox |
||
| − | |Name = G30 Walker |
||
| − | |Image = G30 Walker.png |
||
| − | |Description = The G30 Walker is a heavy machine gun with a high elevation range and soft point ammunition designed to be more effective against aircraft.<br><br> |
||
| − | |Fire Rate = 600 |
||
| − | |MaxDamage = 115/175 |
||
| − | |MinDamage = 75/500 |
||
| − | |Velocity = 750 |
||
| − | |Reload Speed = 2s/2s |
||
| − | |Ammunition = 75/1125 |
||
| − | |Vehicle Accuracy = 0.75 |
||
| − | |Range = Medium |
||
| − | |Fire Modes = Automatic |
||
| − | |Cert Cost = 750 |
||
| − | |SC Cost = 700}} |
||
| − | {{WeaponInfobox |
||
| − | |Name = G30 Vulcan |
||
| − | |Image = G30 Vulcan.png |
||
| − | |Description = The G30 Vulcan fires armor piercing 30mm rounds capable of damaging heavily armored targets.<br><br><br> |
||
| − | |Empire = TR |
||
| − | |Fire Rate = 800 |
||
| − | |MaxDamage = 120/200 |
||
| − | |MinDamage = 110/300 |
||
| − | |Velocity = 300 |
||
| − | |Reload Speed = 2.5s/2.5s |
||
| − | |Ammunition = 30/450 |
||
| − | |Vehicle Accuracy = 0.5/0.05 |
||
| − | |Range = Medium |
||
| − | |Fire Modes = Automatic |
||
| − | |Cert Cost = 1000 |
||
| − | |SC Cost = 700}} |
||
| − | {{WeaponInfobox |
||
| − | |Name = G40-F Ranger |
||
| − | |Image = G40-F Ranger.png |
||
| − | |Description = The G-40F Ranger is an air deterrent flak cannon. It has a high elevation range and launches 40mm flak rounds that burst when near enemy aircraft. |
||
| − | |Fire Rate = 330 |
||
| − | |MaxDamage = 100/50 |
||
| − | |MinDamage = 20/200 |
||
| − | |MaxInDamage = 38/6 |
||
| − | |MinInDamage = 1/8 |
||
| − | |Velocity = 325 |
||
| − | |Reload Speed = 3s/3s |
||
| − | |Ammunition = 32/384 |
||
| − | |Vehicle Accuracy = 1.5/0.2 |
||
| − | |Range = Long |
||
| − | |Fire Modes = Automatic |
||
| − | |Cert Cost = 750 |
||
| − | |SC Cost = 700}} |
||
| − | {{Clr}} |
||
| − | {{WeaponInfobox |
||
| − | |Name = M12 Kobalt |
||
| − | |Image = M12 Kobalt.png |
||
| − | |Description = The M12 Kobalt is a 50 cal machine gun that is effective against infantry targets.<br><br> |
||
| − | |Fire Rate = 550 |
||
| − | |MaxDamage = 193/10 |
||
| − | |MinDamage = 150/100 |
||
| − | |Velocity = 600 |
||
| − | |Reload Speed = 2.5s/2.5s |
||
| − | |Ammunition = 100/500 |
||
| − | |Vehicle Accuracy = 0.25/0.1 |
||
| − | |Range = Medium |
||
| − | |Fire Modes = Automatic |
||
| − | |Cert Cost = 100 |
||
| − | |SC Cost = 250}} |
||
| − | {{WeaponInfobox |
||
| − | |Name = M20 Basilisk |
||
| − | |Image = M20 Basilisk.png |
||
| − | |Description = The Basilisk is a slow-firing 20mm HMG that effectively damages all targets.<br><br> |
||
| − | |Fire Rate = 300 |
||
| − | |MaxDamage = 275/50 |
||
| − | |MinDamage = 175/100 |
||
| − | |Velocity = 500 |
||
| − | |Reload Speed = 2.5s/2.5s |
||
| − | |Ammunition = 100/500 |
||
| − | |Vehicle Accuracy = 0.75/0.1 |
||
| − | |Range = Medium |
||
| − | |Fire Modes = Automatic |
||
| − | |Cert Cost = Default |
||
| − | |SC Cost = Default}} |
||
| − | {{WeaponInfobox |
||
| − | |Name = P525 Marauder |
||
| − | |Image = P525 Marauder.png |
||
| − | |Description = The Marauder P525 is capable of rapidly firing 40mm high explosive grenades that are effective against soft targets. |
||
| − | |Empire = TR |
||
| − | |Fire Rate = 200 |
||
| − | |MaxDamage = 350 |
||
| − | |MinDamage = 350 |
||
| − | |MaxInDamage = 450/2 |
||
| − | |MinInDamage = 1/4 |
||
| − | |Velocity = 125 |
||
| − | |Reload Speed = 3s/3s |
||
| − | |Ammunition = 10/200 |
||
| − | |Vehicle Accuracy = 0.1 |
||
| − | |Range = Medium |
||
| − | |Fire Modes = Automatic |
||
| − | |Cert Cost = 250 |
||
| − | |SC Cost = 500 |
||
| − | }} |
||
| − | {{Clr}}<br /> |
||
| − | {{Prowler Secondary Weapon Certifications 2}} |
||
| − | {{Clr}} |
||
| − | {{WeaponInfobox |
||
| − | |Name = E540 Halberd |
||
| − | |Image = E540 Halberd.png |
||
| − | |Description = The E540 Halberd fires 85mm armor piercing rockets. |
||
| − | |Fire Rate = 60 |
||
| − | |MaxDamage = 1500 |
||
| − | |MinDamage = 1500 |
||
| − | |MaxInDamage = 750/1 |
||
| − | |MinInDamage = 1/3 |
||
| − | |Velocity = 275 |
||
| − | |Reload Speed = 3.25s/3.25s |
||
| − | |Ammunition = 1/30 |
||
| − | |Range = Long |
||
| − | |Fire Modes = Automatic |
||
| − | |Cert Cost = 750 |
||
| − | |SC Cost = 700}} |
||
| − | {{Clr}} |
||
| − | |||
| − | ==Weapon Ribbons and Medals== |
||
| − | With any Prowler weapon, it is possible to get both Ribbons and Medals. Each Ribbon is a standard reward for achieving a set amount of kills with a Prowler weapon. Medals relate to how many overall kills you have with the Prowlers weaponry. |
||
| − | ===Ribbons=== |
||
| − | {{Ribbon |
||
| − | |Name=Prowler Service Ribbon |
||
| − | |Image=MBT_Vehicle_Ribbon.png |
||
| − | |Requirement=10 kills. |
||
| − | |Name1=Driver Service Ribbon |
||
| − | |Image1=Piloting_Ribbon.png |
||
| − | |Requirement1=20 driver assists |
||
| − | |ShowLink=true}} |
||
| − | |||
| − | ===Medals=== |
||
| − | {{Medals}} |
||
| − | |||
| − | == Customizations == |
||
| − | {| align="center" class="mw-collapsible mw-collapsed" width="660" cellpadding="0" cellspacing="1" style="text-align:left;" |
||
| − | | colspan="7" class="cert-header" style="text-align:center;" |Prowler Customizations |
||
| − | |- |
||
| − | | class="column-header" style="text-align: center; width: 60px;"|Name |
||
| − | | class="column-header" style="text-align: center; width: 100px;"|Permanent Cost<br />(Station Cash only) |
||
| − | | class="column-header" style="text-align: center; width: 100px;"|Style |
||
| − | |- |
||
| − | | class="row-odd" style="width:120px;" |Cyan Prowler Chassis Lights |
||
| − | | style="text-align:center;" class="row-odd" |[[File:Icon_resource_station_cash.png|20px|Station Cash]] 450 |
||
| − | | style="text-align:center;" class="row-odd" |[[File:Cyan_Prowler_Chasis_Lights.png|100px|center]] |
||
| − | |- |
||
| − | | class="row-even" style="width:120px;" |White Prowler Chassis Lights |
||
| − | | style="text-align:center;" class="row-even" |[[File:Icon_resource_station_cash.png|20px|Station Cash]] 450 |
||
| − | | style="text-align:center;" class="row-even" |[[File:White_Prowler_Chasis_Lights.png|100px|center]] |
||
| − | |- |
||
| − | | class="row-odd" style="width:120px;" |Orange Prowler Chassis Lights |
||
| − | | style="text-align:center;" class="row-odd" |[[File:Icon_resource_station_cash.png|20px|Station Cash]] 450 |
||
| − | | style="text-align:center;" class="row-odd" |[[File:Orange_Prowler_Chasis_Lights.png|100px|center]] |
||
| − | |- |
||
| − | | class="row-even" style="width:120px;" |[[Red Prowler Chassis Lights]] |
||
| − | | style="text-align:center;" class="row-even" |[[File:Icon_resource_station_cash.png|20px|Station Cash]] 750 |
||
| − | | style="text-align:center;" class="row-even" |[[File:Red_Prowler_Chasis_Lights.png|100px|center]] |
||
| − | |- |
||
| − | | class="row-odd" style="width:120px;" |Prowler Martial Plating |
||
| − | | style="text-align:center;" class="row-odd" |[[File:Icon_resource_station_cash.png|20px|Station Cash]] 650 |
||
| − | | style="text-align:center;" class="row-odd" |[[File:Prowler_Martial_Plating.png|100px|center]] |
||
| − | |- |
||
| − | | class="row-even" style="width:120px;" |Prowler Fleet Plating |
||
| − | | style="text-align:center;" class="row-even" |[[File:Icon_resource_station_cash.png|20px|Station Cash]] 650 |
||
| − | | style="text-align:center;" class="row-even" |[[File:Prowler_Fleet_Plating.png|100px|center]] |
||
| − | |- |
||
| − | | class="row-odd" style="width:120px;" |Prowler Stalwart Plating |
||
| − | | style="text-align:center;" class="row-odd" |[[File:Icon_resource_station_cash.png|20px|Station Cash]] 650 |
||
| − | | style="text-align:center;" class="row-odd" |[[File:Prowler_Stalwart_Plating.png|100px|center]] |
||
| − | |- |
||
| − | | class="row-even" style="width:120px;" |Prowler Adept Plating |
||
| − | | style="text-align:center;" class="row-even" | |
||
| − | [[File:Icon_resource_station_cash.png|20px|Station Cash]] 650 |
||
| − | | style="text-align:center;" class="row-even" |[[File:Prowler_Plating_4.png|100px|center]] |
||
| − | |- |
||
| − | | class="row-odd" style="width:120px;" |Prowler Scout Plating |
||
| − | | style="text-align:center;" class="row-odd" | |
||
| − | [[File:Icon_resource_station_cash.png|20px|Station Cash]] 650 |
||
| − | | style="text-align:center;" class="row-odd" |[[File:Prowler_Plating_5.png|100px|center]] |
||
| − | |- |
||
| − | | class="row-even" style="width:120px;" |Prowler Red Lumifiber Trim |
||
| − | | style="text-align:center;" class="row-even" | |
||
| − | [[File:Icon_resource_station_cash.png|20px|Station Cash]] 750 |
||
| − | | style="text-align:center;" class="row-even" |[[File:Prowler_Red_Lumifiber_Trim.png|100px|center]] |
||
| − | |} |
||
| − | |||
| − | |||
[[de:Prowler]] |
[[de:Prowler]] |
||
[[Category:Vehicles]] |
[[Category:Vehicles]] |
||
2,814
pages
English