mNo edit summary |
|||
| (45 intermediate revisions by 17 users not shown) | |||
| Line 1: | Line 1: | ||
| + | {{Contents Current|Patch Link = August 29, 2019 Hotfix|Patch = 2019-08-29}}__NOEDITSECTION__ __NOTOC__ |
||
== Weapons == |
== Weapons == |
||
| ⚫ | |||
| − | |||
| − | <div style="text-align: center"> |
||
| − | <div style="display: inline-block"> |
||
| − | {| cellspacing="7" |
||
|- |
|- |
||
| − | |[[File: |
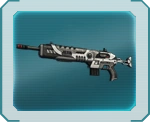
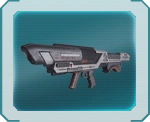
+ | |[[File:Weapons Assault Rifle.png|link=Assault Rifles]] |
| ⚫ | |||
| ⚫ | |||
| − | |[[ |
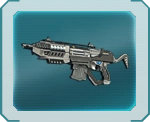
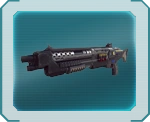
+ | |[[File:Weapons Carbine.png|link=Carbines]] |
| − | |} |
||
| − | </div><div style="display: inline-block"> |
||
| − | {| cellspacing="7" |
||
| − | |- |
||
| − | |[[File:Weapons_Assault_Rifle.png|link=Assault Rifles]] |
||
|- |
|- |
||
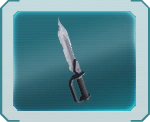
|[[Assault Rifles]] |
|[[Assault Rifles]] |
||
| ⚫ | |||
| − | |} |
||
| + | |[[Carbines]] |
||
| − | </div><div style="display: inline-block"> |
||
| − | {| cellspacing="7" |
||
|- |
|- |
||
| − | |[[File: |
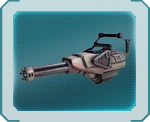
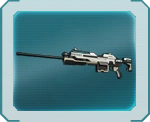
+ | |[[File:Weapons Chain.png|link=Heavy Guns]] |
| + | |[[File:Weapons LMG.png|link=Light Machine Guns]] |
||
| ⚫ | |||
|- |
|- |
||
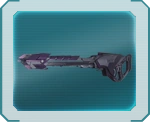
| + | |[[Heavy Guns]] |
||
|[[Light Machine Guns]] |
|[[Light Machine Guns]] |
||
| + | |[[Melee Weapons]] |
||
| − | |} |
||
| − | </div></div> |
||
| − | |||
| − | <div style="text-align: center"> |
||
| − | <div style="display: inline-block"> |
||
| − | {| cellspacing="7" |
||
|- |
|- |
||
| − | |[[File: |
+ | |[[File:Weapons Launcher.png|link=Rocket Launchers]] |
| ⚫ | |||
| − | |- |
||
| ⚫ | |||
| − | |[[Carbines|Carbines<br /><br />]] |
||
| − | |} |
||
| − | </div><div style="display: inline-block"> |
||
| − | {| cellspacing="7" |
||
| − | |- |
||
| − | |[[File:Weapons_Chain.png|link=Specialized Heavy Assault Weaponry]] |
||
| − | |- |
||
| − | |[[Specialized Heavy Assault Weaponry|Specialized Heavy<br />Assault Weaponry]] |
||
| − | |} |
||
| − | </div><div style="display: inline-block"> |
||
| − | {| cellspacing="7" |
||
| − | |- |
||
| ⚫ | |||
| − | |- |
||
| ⚫ | |||
| − | |} |
||
| − | </div></div> |
||
| − | |||
| − | <div style="text-align: center"> |
||
| − | <div style="display: inline-block"> |
||
| − | {| cellspacing="7" |
||
| − | |- |
||
| ⚫ | |||
|- |
|- |
||
| ⚫ | |||
|[[Scout Rifles]] |
|[[Scout Rifles]] |
||
| − | |} |
||
| − | </div><div style="display: inline-block"> |
||
| − | {| cellspacing="7" |
||
| − | |- |
||
| ⚫ | |||
| − | |- |
||
|[[Shotguns]] |
|[[Shotguns]] |
||
| − | |} |
||
| − | </div><div style="display: inline-block"> |
||
| − | {| cellspacing="7" |
||
|- |
|- |
||
| − | |[[File: |
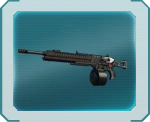
+ | |[[File:Weapons Pistol.png|link=Sidearms]] |
| ⚫ | |||
| + | |[[File:Weapons SMG.png|link=Submachine Guns]] |
||
|- |
|- |
||
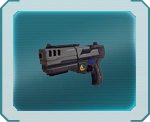
| + | |[[Sidearms]] |
||
| ⚫ | |||
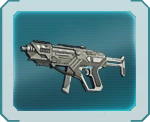
|[[Submachine Guns]] |
|[[Submachine Guns]] |
||
| − | |} |
||
| − | </div></div> |
||
| − | |||
| − | <div style="text-align: center"> |
||
| − | <div style="display: inline-block"> |
||
| − | {| cellspacing="7" |
||
|- |
|- |
||
| − | |[[File: |
+ | |[[File:AA Max Button.png|link=MAX Anti-Aircraft]] |
| ⚫ | |||
| − | |- |
||
| ⚫ | |||
| − | |[[Pistols]] |
||
| − | |} |
||
| − | </div><div style="display: inline-block"> |
||
| − | {| cellspacing="7" |
||
| − | |- |
||
| − | |[[File:Weapons_Launcher.png|link=Rocket Launchers]] |
||
| − | |- |
||
| ⚫ | |||
| − | |} |
||
| − | </div><div style="display: inline-block"> |
||
| − | {| cellspacing="7" |
||
| − | |- |
||
| ⚫ | |||
| − | |- |
||
| ⚫ | |||
| − | |} |
||
| − | </div></div> |
||
| − | |||
| − | <div style="text-align: center"> |
||
| − | <div style="display: inline-block"> |
||
| − | {| cellspacing="7" |
||
| − | |- |
||
| ⚫ | |||
|- |
|- |
||
| + | |[[MAX Anti-Aircraft]] |
||
|[[MAX Anti-Infantry]] |
|[[MAX Anti-Infantry]] |
||
| − | |} |
||
| − | </div><div style="display: inline-block"> |
||
| − | {| cellspacing="7" |
||
| − | |- |
||
| ⚫ | |||
| − | |- |
||
|[[MAX Anti-Vehicle]] |
|[[MAX Anti-Vehicle]] |
||
|} |
|} |
||
| − | </div></div> |
||
| ⚫ | |||
| − | |||
| ⚫ | |||
| ⚫ | |||
| colspan="7" class="cert-header" style="text-align:center;" |Weapon Availability By Class |
| colspan="7" class="cert-header" style="text-align:center;" |Weapon Availability By Class |
||
|- |
|- |
||
| − | | class="column-header" style="text-align: center; width: |
+ | | class="column-header" style="text-align: center; width: 20%;" |Weapon |
| − | | class="column-header" style="text-align: center; width: |
+ | | class="column-header" style="text-align: center; width: 14%;" |[[Infiltrator]] |
| − | | class="column-header" style="text-align: center; width: |
+ | | class="column-header" style="text-align: center; width: 14%;" |[[Light Assault]] |
| − | | class="column-header" style="text-align: center; width: |
+ | | class="column-header" style="text-align: center; width: 14%;" |[[Combat Medic]] |
| − | | class="column-header" style="text-align: center; width: |
+ | | class="column-header" style="text-align: center; width: 14%;" |[[Engineer]] |
| − | | class="column-header" style="text-align: center; width: |
+ | | class="column-header" style="text-align: center; width: 14%;" |[[Heavy Assault]] |
| − | | class="column-header" style="text-align: center; width: |
+ | | class="column-header" style="text-align: center; width: 14%;" |[[MAX]] |
|- |
|- |
||
| − | | class="row- |
+ | | class="row-even" style="width:120px;" |[[Sniper_Rifles|Sniper Rifles]] |
| − | | style="text-align:center;" class="row- |
+ | | style="text-align:center;" class="row-even" |{{Icon|Yes|25px}} |
| − | | style="text-align:center;" class="row- |
+ | | style="text-align:center;" class="row-even" |{{Icon|No|25px}} |
| − | | style="text-align:center;" class="row- |
+ | | style="text-align:center;" class="row-even" |{{Icon|No|25px}} |
| − | | style="text-align:center;" class="row- |
+ | | style="text-align:center;" class="row-even" |{{Icon|No|25px}}<ref>Engineers are capable of equipping the <strong>[[NS-AM7 Archer]]</strong>, a bolt-action anti-materiel rifle which is counted as a sniper rifle.</ref> |
| − | | style="text-align:center;" class="row- |
+ | | style="text-align:center;" class="row-even" |{{Icon|No|25px}} |
| − | | style="text-align:center;" class="row- |
+ | | style="text-align:center;" class="row-even" |{{Icon|No|25px}} |
|- |
|- |
||
| − | | class="row- |
+ | | class="row-odd" style="width:120px;" |[[Scout Rifles]] |
| − | | style="text-align:center;" class="row- |
+ | | style="text-align:center;" class="row-odd" |{{Icon|Yes|25px}} |
| − | | style="text-align:center;" class="row- |
+ | | style="text-align:center;" class="row-odd" |{{Icon|No|25px}} |
| − | | style="text-align:center;" class="row- |
+ | | style="text-align:center;" class="row-odd" |{{Icon|No|25px}} |
| − | | style="text-align:center;" class="row- |
+ | | style="text-align:center;" class="row-odd" |{{Icon|No|25px}} |
| − | | style="text-align:center;" class="row- |
+ | | style="text-align:center;" class="row-odd" |{{Icon|No|25px}} |
| − | | style="text-align:center;" class="row- |
+ | | style="text-align:center;" class="row-odd" |{{Icon|No|25px}} |
|- |
|- |
||
| − | | class="row- |
+ | | class="row-even" style="width:120px;" |[[Carbines]] |
| − | | style="text-align:center;" class="row- |
+ | | style="text-align:center;" class="row-even" |{{Icon|No|25px}} |
| − | | style="text-align:center;" class="row- |
+ | | style="text-align:center;" class="row-even" |{{Icon|Yes|25px}} |
| − | | style="text-align:center;" class="row- |
+ | | style="text-align:center;" class="row-even" |{{Icon|Yes|25px}}({{Resources||ASP|small}}) |
| − | | style="text-align:center;" class="row- |
+ | | style="text-align:center;" class="row-even" |{{Icon|Yes|25px}} |
| − | | style="text-align:center;" class="row- |
+ | | style="text-align:center;" class="row-even" |{{Icon|No|25px}} |
| − | | style="text-align:center;" class="row- |
+ | | style="text-align:center;" class="row-even" |{{Icon|No|25px}} |
|- |
|- |
||
| − | | class="row- |
+ | | class="row-odd" style="width:120px;" |[[Assault Rifles]] |
| − | | style="text-align:center;" class="row- |
+ | | style="text-align:center;" class="row-odd" |{{Icon|No|25px}} |
| − | | style="text-align:center;" class="row- |
+ | | style="text-align:center;" class="row-odd" |{{Icon|No|25px}} |
| − | | style="text-align:center;" class="row- |
+ | | style="text-align:center;" class="row-odd" |{{Icon|Yes|25px}} |
| − | | style="text-align:center;" class="row- |
+ | | style="text-align:center;" class="row-odd" |{{Icon|Yes|25px}}({{Resources||ASP|small}}) |
| − | | style="text-align:center;" class="row- |
+ | | style="text-align:center;" class="row-odd" |{{Icon|No|25px}} |
| − | | style="text-align:center;" class="row- |
+ | | style="text-align:center;" class="row-odd" |{{Icon|No|25px}} |
|- |
|- |
||
| − | | class="row- |
+ | | class="row-even" style="width:120px;" |[[Light_Machine_Guns|LMGs]] |
| − | | style="text-align:center;" class="row- |
+ | | style="text-align:center;" class="row-even" |{{Icon|No|25px}} |
| − | | style="text-align:center;" class="row- |
+ | | style="text-align:center;" class="row-even" |{{Icon|No|25px}} |
| − | | style="text-align:center;" class="row- |
+ | | style="text-align:center;" class="row-even" |{{Icon|No|25px}} |
| − | | style="text-align:center;" class="row- |
+ | | style="text-align:center;" class="row-even" |{{Icon|Yes|25px}}({{Resources||ASP|small}}) |
| − | | style="text-align:center;" class="row- |
+ | | style="text-align:center;" class="row-even" |{{Icon|Yes|25px}} |
| − | | style="text-align:center;" class="row- |
+ | | style="text-align:center;" class="row-even" |{{Icon|No|25px}} |
|- |
|- |
||
| − | | class="row- |
+ | | class="row-odd" style="width:120px;" |[[Rocket Launchers]] |
| − | | style="text-align:center;" class="row- |
+ | | style="text-align:center;" class="row-odd" |{{Icon|No|25px}} |
| − | | style="text-align:center;" class="row- |
+ | | style="text-align:center;" class="row-odd" |{{Icon|No|25px}}<ref>Light Assaults are capable of equipping the <strong>[[Rocklet Rifle]]</strong>, a miniature rocket launcher, |
| + | though it does not count torwards rocket launcher directives.</ref> |
||
| ⚫ | |||
| − | | style="text-align:center;" class="row- |
+ | | style="text-align:center;" class="row-odd" |{{Icon|No|25px}} |
| − | | style="text-align:center;" class="row- |
+ | | style="text-align:center;" class="row-odd" |{{Icon|No|25px}} |
| − | | style="text-align:center;" class="row- |
+ | | style="text-align:center;" class="row-odd" |{{Icon|Yes|25px}} |
| + | | style="text-align:center;" class="row-odd" |{{Icon|No|25px}} |
||
|- |
|- |
||
| − | | class="row- |
+ | | class="row-even" style="width:120px;" |[[Heavy Guns]] |
| − | | style="text-align:center;" class="row- |
+ | | style="text-align:center;" class="row-even" |{{Icon|No|25px}} |
| − | | style="text-align:center;" class="row- |
+ | | style="text-align:center;" class="row-even" |{{Icon|No|25px}} |
| − | | style="text-align:center;" class="row- |
+ | | style="text-align:center;" class="row-even" |{{Icon|No|25px}} |
| − | | style="text-align:center;" class="row- |
+ | | style="text-align:center;" class="row-even" |{{Icon|No|25px}} |
| − | | style="text-align:center;" class="row- |
+ | | style="text-align:center;" class="row-even" |{{Icon|Yes|25px}} |
| − | | style="text-align:center;" class="row- |
+ | | style="text-align:center;" class="row-even" |{{Icon|No|25px}} |
|- |
|- |
||
| − | | class="row- |
+ | | class="row-odd" style="width:120px;" |[[Battle Rifles]] |
| − | | style="text-align:center;" class="row- |
+ | | style="text-align:center;" class="row-odd" |{{Icon|Yes|25px}} |
| − | | style="text-align:center;" class="row- |
+ | | style="text-align:center;" class="row-odd" |{{Icon|No|25px}} |
| − | | style="text-align:center;" class="row- |
+ | | style="text-align:center;" class="row-odd" |{{Icon|Yes|25px}} |
| − | | style="text-align:center;" class="row- |
+ | | style="text-align:center;" class="row-odd" |{{Icon|Yes|25px}} |
| − | | style="text-align:center;" class="row- |
+ | | style="text-align:center;" class="row-odd" |{{Icon|Yes|25px}} |
| − | | style="text-align:center;" class="row- |
+ | | style="text-align:center;" class="row-odd" |{{Icon|No|25px}} |
|- |
|- |
||
| − | | class="row- |
+ | | class="row-even" style="width:120px;" |[[Shotguns]] |
| − | | style="text-align:center;" class="row- |
+ | | style="text-align:center;" class="row-even" |{{Icon|No|25px}} |
| − | | style="text-align:center;" class="row- |
+ | | style="text-align:center;" class="row-even" |{{Icon|Yes|25px}} |
| − | | style="text-align:center;" class="row- |
+ | | style="text-align:center;" class="row-even" |{{Icon|Yes|25px}} |
| − | | style="text-align:center;" class="row- |
+ | | style="text-align:center;" class="row-even" |{{Icon|Yes|25px}} |
| − | | style="text-align:center;" class="row- |
+ | | style="text-align:center;" class="row-even" |{{Icon|Yes|25px}} |
| − | | style="text-align:center;" class="row- |
+ | | style="text-align:center;" class="row-even" |{{Icon|No|25px}} |
|- |
|- |
||
| − | | class="row- |
+ | | class="row-odd" style="width:120px;" |[[Submachine_Guns|SMGs]] |
| − | | style="text-align:center;" class="row- |
+ | | style="text-align:center;" class="row-odd" |{{Icon|Yes|25px}} |
| − | | style="text-align:center;" class="row- |
+ | | style="text-align:center;" class="row-odd" |{{Icon|Yes|25px}} |
| − | | style="text-align:center;" class="row- |
+ | | style="text-align:center;" class="row-odd" |{{Icon|Yes|25px}} |
| − | | style="text-align:center;" class="row- |
+ | | style="text-align:center;" class="row-odd" |{{Icon|Yes|25px}} |
| − | | style="text-align:center;" class="row- |
+ | | style="text-align:center;" class="row-odd" |{{Icon|Yes|25px}} |
| − | | style="text-align:center;" class="row- |
+ | | style="text-align:center;" class="row-odd" |{{Icon|No|25px}} |
|- |
|- |
||
| − | | class="row- |
+ | | class="row-even" style="width:120px;" |[[Sidearms]] |
| − | | style="text-align:center;" class="row- |
+ | | style="text-align:center;" class="row-even" |{{Icon|Yes|25px}} |
| − | | style="text-align:center;" class="row- |
+ | | style="text-align:center;" class="row-even" |{{Icon|Yes|25px}} |
| − | | style="text-align:center;" class="row- |
+ | | style="text-align:center;" class="row-even" |{{Icon|Yes|25px}} |
| − | | style="text-align:center;" class="row- |
+ | | style="text-align:center;" class="row-even" |{{Icon|Yes|25px}} |
| − | | style="text-align:center;" class="row- |
+ | | style="text-align:center;" class="row-even" |{{Icon|Yes|25px}} |
| − | | style="text-align:center;" class="row- |
+ | | style="text-align:center;" class="row-even" |{{Icon|No|25px}} |
|- |
|- |
||
| − | | class="row- |
+ | | class="row-odd" style="width:120px;" |[[Melee_Weapons|Melee]] |
| − | | style="text-align:center;" class="row- |
+ | | style="text-align:center;" class="row-odd" |{{Icon|Yes|25px}} |
| − | | style="text-align:center;" class="row- |
+ | | style="text-align:center;" class="row-odd" |{{Icon|Yes|25px}} |
| − | | style="text-align:center;" class="row- |
+ | | style="text-align:center;" class="row-odd" |{{Icon|Yes|25px}} |
| − | | style="text-align:center;" class="row- |
+ | | style="text-align:center;" class="row-odd" |{{Icon|Yes|25px}} |
| − | | style="text-align:center;" class="row- |
+ | | style="text-align:center;" class="row-odd" |{{Icon|Yes|25px}} |
| − | | style="text-align:center;" class="row- |
+ | | style="text-align:center;" class="row-odd" |{{Icon|Yes|25px}} |
|} |
|} |
||
| + | ==Unlocking Weaponry == |
||
| − | ==Weapon Customizations== |
||
| + | All weapons, barring those rewarded from Directives such as the [[Betelgeuse 54-A]], can be unlocked with [[Daybreak Cash]] or [[Certification Points]], with exception to those that are coloured variants of another weapon such as the [[NS-11AB]] only being available for purchase with Daybreak Cash. |
||
| − | Each weapon can be customized with a specific camo pattern to suit your personal tastes. These customizations come in single use and permanent styles for your gun. |
||
| + | Weapons can also be tested for free through two different methods; in the [[VR Training Facility]], which offers access to all non-directive weaponry and their attachments for free, or through [[Weapon Trial]]s that allow free use of a weapon for half an hour every eight hours, though without free access to attachments. |
||
| − | ==List of Weapon Camos== |
||
| − | Each weapon can be customized with a specific camo pattern to suit your personal tastes. These customizations come only in permanent style(unlimited use for 500 [[File:Icon_resource_station_cash.png|20px|Station Cash]]) . |
||
| + | If a weapon is available for use on more than one class, purchasing the weapon (regardless of the currency used) will unlock it for all appropriate classes. |
||
| − | <gallery spacing="small" orientation="square" captionalign="center"> |
||
| − | African_Forest_Camo.png|African Forest |
||
| − | NC Alpha Squad Camo.png|{{ncicon}} [[Alpha Squad Camo#Weapon Camouflage|Alpha Squad]]. No longer available. |
||
| − | TR Alpha Squad Camo.png|{{tricon}} [[Alpha Squad Camo#Weapon Camouflage|Alpha Squad]]. No longer available. |
||
| − | VS Alpha Squad Camo.png|{{vsicon}} [[Alpha Squad Camo#Weapon Camouflage|Alpha Squad]]. No longer available. |
||
| − | Amerish_Brush_Camo.png|Amerish Brush |
||
| − | Amerish_Grassland_Camo.png|Amerish Grassland |
||
| − | Amerish_Leaf_Camo.png|Amerish Leaf |
||
| − | Amerish_Scrub_Camo.png|Amerish Scrub |
||
| − | Arid_Forest_Camo.png|[[Arid Forest Camo#Weapon Camouflage|Arid Forest]] |
||
| − | California_Scrub_Camo.png|California Scrub |
||
| − | NC_Circuit_Board_Camo.png|{{ncicon}} Circuit Board Camo. Available as part of an NVidia promotion. |
||
| − | TR_Circuit_Board_Camo.png|{{tricon}} Circuit Board Camo. Available as part of an NVidia promotion. |
||
| − | VS_Circuit_Board_Camo.png|{{vsicon}} Circuit Board Camo. Available as part of an NVidia promotion. |
||
| − | Nc_clover_permanent.png|[[Clover Camo#Weapon Camouflage|Clover]] St Patricks Day limited edition. No longer available. |
||
| − | Desert_Scrub_Camo.png|[[Desert Scrub V1 Camo#Weapon Camouflage|Desert Scrub v1]] |
||
| − | Desert_Scrub_V2.png|Desert Scrub v2 |
||
| − | NC Digital Camo.png|{{ncicon}} [[Digital Camo#Weapon Camouflage|Digital Camo]]. |
||
| − | TR Digital Camo.png|{{tricon}} [[Digital Camo#Weapon Camouflage|Digital Camo]]. |
||
| − | VS Digital Camo.png|{{vsicon}} [[Digital Camo#Weapon Camouflage|Digital Camo]]. |
||
| − | Esamir_Ice_Camo.png|Esamir Ice |
||
| − | Esamir_Snow_Camo.png|Esamir Snow |
||
| − | Forest_Greyscale_Camo.png|[[Forest Greyscale Camo#Weapon Camouflage|Forest Greyscale]] |
||
| − | Giraffe_Camo.png|[[Giraffe Camo#Weapon Camouflage|Giraffe]] |
||
| − | Indar_Canyons_V1.png|Indar Canyons v1 |
||
| − | Indar_Canyons_V2_Camo.png|Indar Canyons v2 |
||
| − | Indar_Dry_Brush_Camo.png|Indar Dry Brush |
||
| − | Indar_Dry_Ocean.png|Indar Dry Ocean |
||
| − | Indar_Dunes_Camo.png|Indar Dunes |
||
| − | Indar_Highlands_V1_Camo.png|Indar Highland v1 |
||
| − | Indar_Highland_V2_Camo.png|Indar Highland v2 |
||
| − | Indar_Plateau_Camo.png|Indar Plateau |
||
| − | Indar_Savanna_Camo.png|Indar Savanna |
||
| − | Indar_Scrub.png|Indar Scrub |
||
| − | India_Scrub_Camo.png|[[India Scrub Camo#Weapon Camouflage|India Scrub]] |
||
| − | Jungle_Forest_Camo.png|[[Jungle Forest Camo#Jungle Forest Weapon Camo|Jungle Forest]] |
||
| − | NC Loyal Soldier Camo.png|{{ncicon}} [[Loyal Soldier Camo#Weapon Camouflage|Loyal Soldier]]. Available as a promotion during May 2013. |
||
| − | TR Loyal Soldier Camo.png|{{tricon}} [[Loyal Soldier Camo#Weapon Camouflage|Loyal Soldier]]. Available as a promotion during May 2013. |
||
| − | VS Loyal Soldier Camo.png|{{vsicon}} [[Loyal Soldier Camo#Weapon Camouflage|Loyal Soldier]]. Available as a promotion during May 2013. |
||
| − | Northern_Forest_Camo.png|[[Northern Forest Camo#Weapon Camouflage|Northern Forest]] |
||
| − | Palm Camo.png|Palm Camo |
||
| − | Pine_Forest_Camo.png|[[Pine Forest Camo#Weapon Camouflage|Pine Forest]] |
||
| − | Rocky_Tundra_Camo.png|[[Rocky Tundra Camo#Weapon Camouflage|Rocky Tundra]] |
||
| − | Sandy_Scrub_Camo.png|[[Sandy Scrub Camo#Weapon Camouflage|Sandy Scrub]] |
||
| − | Scrub_Forest_Camo.png|[[Scrub Forest Camo#Weapon Camouflage|Scrub Forest]] |
||
| − | Snow_Aspen_Forest_Camo.png|[[Snow Aspen Forest Camo#Weapon Camouflage|Snow Aspen Forest]] |
||
| − | Temperate_Chaparral_Camo.png|Temperate Chaparral |
||
| − | Temperate_Forest_Camo.png|[[Temperate Forest Camo#Weapon Camouflage|Temperate Forest]] |
||
| − | NC Urban Forest.png|{{ncicon}} [[Urban Forest Camo#Weapon Camouflage|Urban Forest]]. |
||
| − | TR Urban Forest.png|{{tricon}} [[Urban Forest Camo#Weapon Camouflage|Urban Forest]]. |
||
| − | VS Urban Forest.png|{{vsicon}} [[Urban Forest Camo#Weapon Camouflage|Urban Forest]]. |
||
| − | Woodland_Camo.png|[[Woodland Camo#Weapon Camouflage|Woodland]] |
||
| − | NC Zebra Camo.png|{{ncicon}} [[Zebra Camo#Weapon Camouflage|Zebra]]. |
||
| − | TR Zebra Camo.png|{{tricon}} [[Zebra Camo#Weapon Camouflage|Zebra]]. |
||
| − | VS Zebra Camo.png|{{vsicon}} [[Zebra Camo#Weapon Camouflage|Zebra]]. |
||
| − | </gallery> |
||
| + | ==Attachments== |
||
| − | ==Empire Weapon Styles (Visual Guide)== |
||
| + | {{main|Weapon Optics and Attachments}} |
||
| − | Each Empire has different weapons technology, and thus different visual styles. TR weapons are ergonomic, lightweight, and sleek. VS weapons are futuristic, shiny, and stylized with neon accents. NC weapons are bulky, utilitarian, and factor-over-form. Below are examples of how each main infantry weapon type looks for each Empire. |
||
| + | Nearly every weapon in Planetside, with few exceptions, has access to at least one attachment. Attachments affect how a gun feels and handles in a variety of ways, such as adding an optic for easier aiming or affecting muzzle velocity and damage fall-off. |
||
| − | {| border="0" cellpadding="1" cellspacing="1" class="article-table" style="margin: 0px auto; width: 500px;" |
||
| + | |||
| − | |[[File:TR Weapon Design - Planetside 2 Guide|thumb|left|300px|Terran Republic Weapons Tech]] |
||
| + | There are four different classes of attachment; Optics, Barrel, Rail, and Ammo. Not all guns have access to an attachment in each category, and their effects can vary drastically. |
||
| − | |[[File:VS Weapon Design - Planetside 2 Guide|thumb|left|300px|Vanu Sovereignty Weapons Tech]] |
||
| + | |||
| − | |} |
||
| + | ==Customization== |
||
| − | {| border="0" cellpadding="0" cellspacing="0" class="article-table article-table-selected" style="width: 200px; height: 200px; margin: 0px auto;" |
||
| + | {{main|Customization}} |
||
| − | |[[File:NC Weapon Design - Planetside 2 Guide|thumb|left|300px|New Conglomerate Weapons Tech]] |
||
| + | Cosmetically, weapons can be modified through [[Camouflage]] and attachments. |
||
| − | |} |
||
| + | |||
| − | [[Category:Empire Weapon Design/Technology]] |
||
| + | Camouflages are primarily available to unlock Daybreak Cash, with a select few unlockable instead through certain directives. They are purely cosmetic, only affecting the paint scheme of whichever gun they are applied to. |
||
| + | |||
| + | Most attachments affect the appearance of the weapon they are attached to, such as a [[Forward Grip]] adding a grip to the gun. Attachments '''do''' affect the statistics of the weapon, elevating their status far beyond simple cosmetics. |
||
| + | |||
| + | == Notes == |
||
| + | {{Reflist}} |
||
[[Category:Weapons]] |
[[Category:Weapons]] |
||
Revision as of 12:54, 10 September 2019
| Page Contents Current As of Patch: | 2019-08-29 |
Weapons


| Weapon Availability By Class | ||||||
| Weapon | Infiltrator | Light Assault | Combat Medic | Engineer | Heavy Assault | MAX |
| Sniper Rifles | ||||||
| Scout Rifles | ||||||
| Carbines | ||||||
| Assault Rifles | ||||||
| LMGs | ||||||
| Rocket Launchers | ||||||
| Heavy Guns | ||||||
| Battle Rifles | ||||||
| Shotguns | ||||||
| SMGs | ||||||
| Sidearms | ||||||
| Melee | ||||||
Unlocking Weaponry
All weapons, barring those rewarded from Directives such as the Betelgeuse 54-A, can be unlocked with Daybreak Cash or Certification Points, with exception to those that are coloured variants of another weapon such as the NS-11AB only being available for purchase with Daybreak Cash.
Weapons can also be tested for free through two different methods; in the VR Training Facility, which offers access to all non-directive weaponry and their attachments for free, or through Weapon Trials that allow free use of a weapon for half an hour every eight hours, though without free access to attachments.
If a weapon is available for use on more than one class, purchasing the weapon (regardless of the currency used) will unlock it for all appropriate classes.
Attachments
- Main article: Weapon Optics and Attachments
Nearly every weapon in Planetside, with few exceptions, has access to at least one attachment. Attachments affect how a gun feels and handles in a variety of ways, such as adding an optic for easier aiming or affecting muzzle velocity and damage fall-off.
There are four different classes of attachment; Optics, Barrel, Rail, and Ammo. Not all guns have access to an attachment in each category, and their effects can vary drastically.
Customization
- Main article: Customization
Cosmetically, weapons can be modified through Camouflage and attachments.
Camouflages are primarily available to unlock Daybreak Cash, with a select few unlockable instead through certain directives. They are purely cosmetic, only affecting the paint scheme of whichever gun they are applied to.
Most attachments affect the appearance of the weapon they are attached to, such as a Forward Grip adding a grip to the gun. Attachments do affect the statistics of the weapon, elevating their status far beyond simple cosmetics.
Notes
- ↑ Engineers are capable of equipping the NS-AM7 Archer, a bolt-action anti-materiel rifle which is counted as a sniper rifle.
- ↑ Light Assaults are capable of equipping the Rocklet Rifle, a miniature rocket launcher, though it does not count torwards rocket launcher directives.